4/15/2019

Tips for 30 Days of Biking Weather in Minnesota


I took the pledge to ride my bike every day in April for the first time in 2017 and now I'm in the midst of my third year participating in 30 Days of Biking.  I've really learned a lot about riding in the wide variety of conditions that Minnesota can dish out in April.  With a little preparation biking can be much more enjoyable and comfortable during this weather transition month.  Here are some tips that you can use to help you through the remainder of 30 Days of Biking.

Keeping a close eye on the weather is key for being prepared and properly dressed for a ride.  With today's smartphone apps you can check the current conditions and forecast for your neighborhood anytime.  I've even used these apps out on rides to check the progress of an incoming storm so I can respond accordingly.  Knowing the forecast also allows me to select my ride apparel the night before which helps speed up the process of getting ready in the morning.


The weather can change quickly in April here in Minnesota so be prepared by bringing along extra cycling apparel and having a place to put it.  If it's chilly in the morning I'll wear a jacket and warmer gloves but keep a lighter change of gloves and ditch the jacket when the day warms up. Shedding some apparel is easy when you have a place to put it, that's why I roll with a frame bag.  If there's a chance of rain I'll keep my windproof/waterproof shell jacket stored in the bag.  The above photo was taken just two hours before I got caught in a complete downpour ten miles from home.  I was glad I brought that jacket along.


Don't put away your winter cycling gear quite yet.  Snow and below freezing temperatures in April are part of living in Minnesota.  I keep all of my winter apparel close at hand for those chilly morning and evening rides as well as the occasional snowstorm.


April weather can be all over the place including fog, rain and overcast days making cyclists less visible to motorists.  This is why I always ride using daytime running lights.  I will use them on daytime flash mode to be seen by motorists that aren't expecting to see cyclists on the roads this time of year.


Plan your rides around the weather.  I watch the weather closely using several apps on my phone to plan around my work schedule the best times to ride.  The above photo was a morning ride I went on just hours before a major snowstorm rolled in.  I usually like to get my rides in before work in the morning but sometimes the weather for my daily ride may be more favorable after work and make for a more enjoyable experience.


If you don't have a pair of fenders for your ride, get some.  April weather can get messy and things are going to get wet.  Fenders can keep you a lot drier and more comfortable when puddle jumping or riding in the rain and snow.  Clip-on style fenders are quick and easy to install or remove so you can put them on only when you need them.


30 Days of Biking has taught me a lot about myself, my bikes and my gear because it has me riding every single day in April which can present some challenges in the form of weather.  I've learned to overcome them by getting out there and riding on some days that I normally wouldn't.  By following the weather closely I can be my most prepared for the elements and enjoy the ride.

3/24/2019

Fatbike Ice Fishing and How to Do It


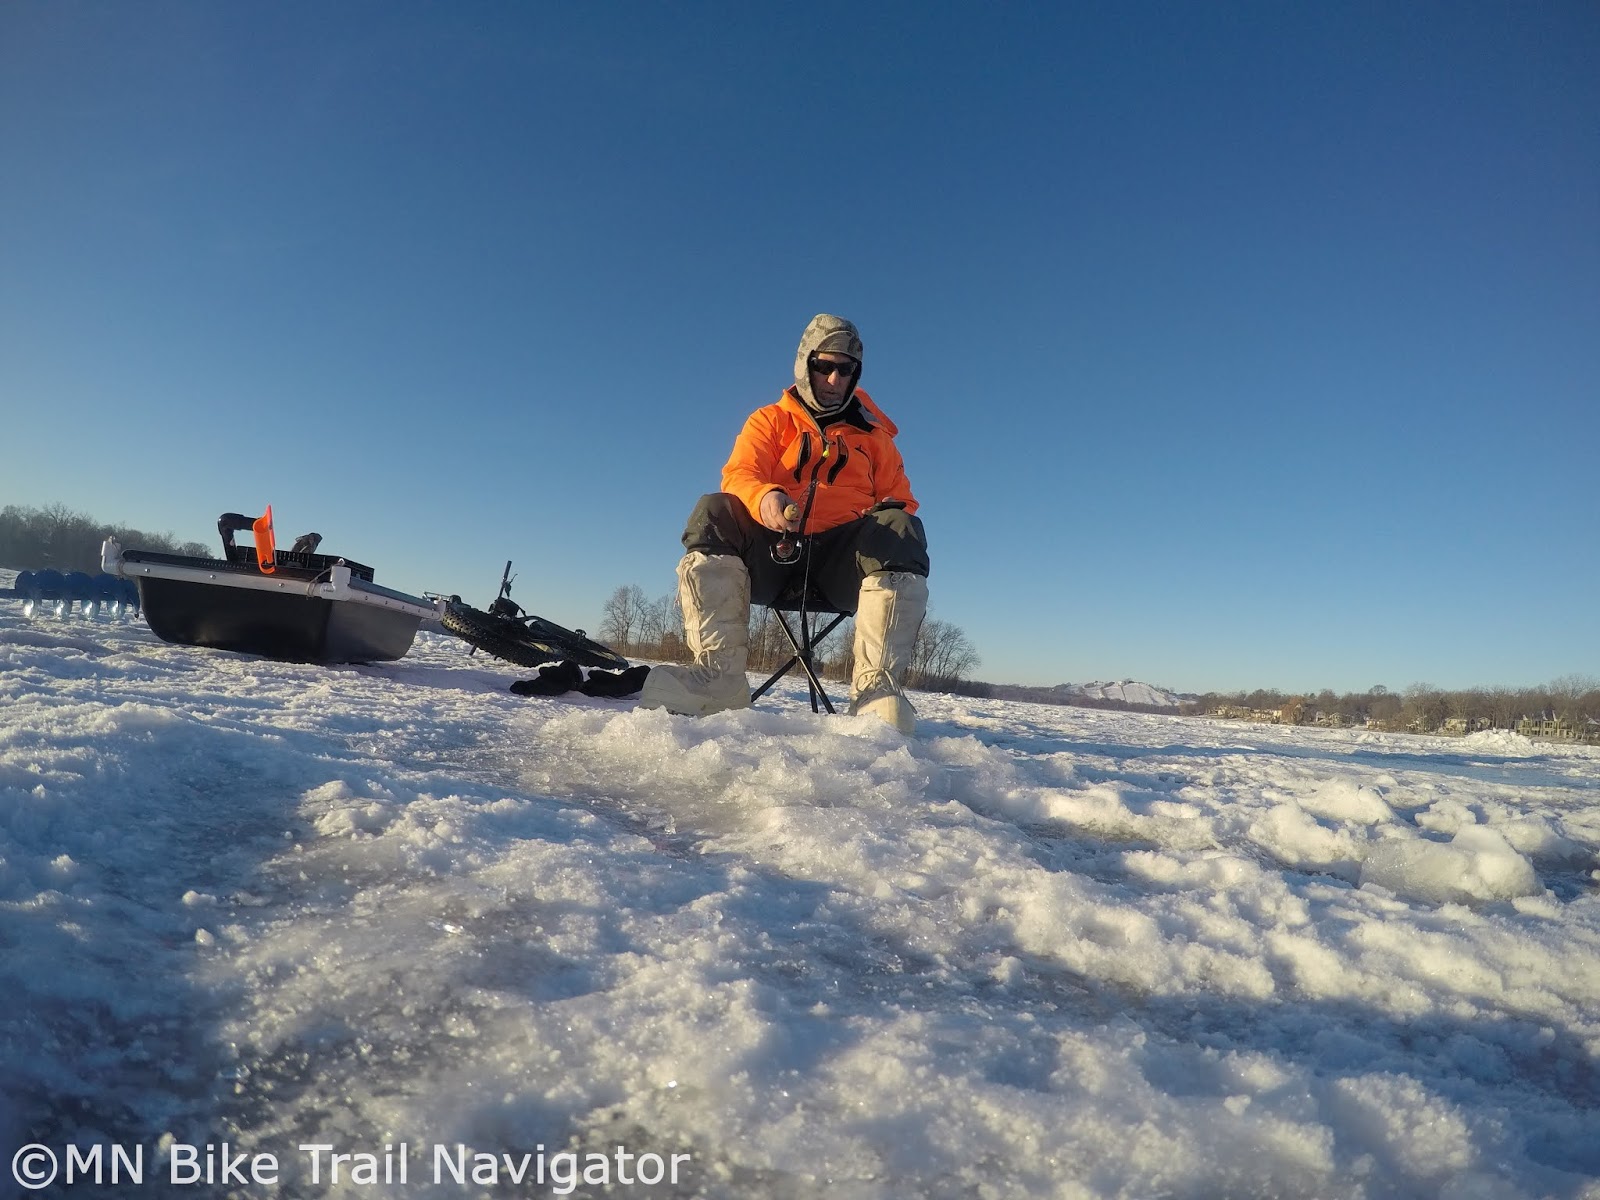
For the last couple of winters I've spent some time out on the lakes riding my fatbike and doing so gave me the idea to combine two things I enjoy, cycling and ice fishing.  This winter I finally gathered together the gear and did it.  Through trial and error, some advice from my pro fisherman friend and input from the ice fishing community on social media, I was able to put together some efficient and effective methods for going after fish during hardwater season.  In this article I will go over some of the gear needed, methods used and a few tips and tricks for a successful and fun outing.

Ice Fishing Gear


I was in need of some new ice fishing gear and a fishing license so I did a little shopping at the start of the season.  I picked up a couple of 24" light action rods for jigging panfish and old school wood tip ups for northern pike.  To protect the rods during transport in a backpack or bucket I covered them with with some inexpensive rod sleeves.


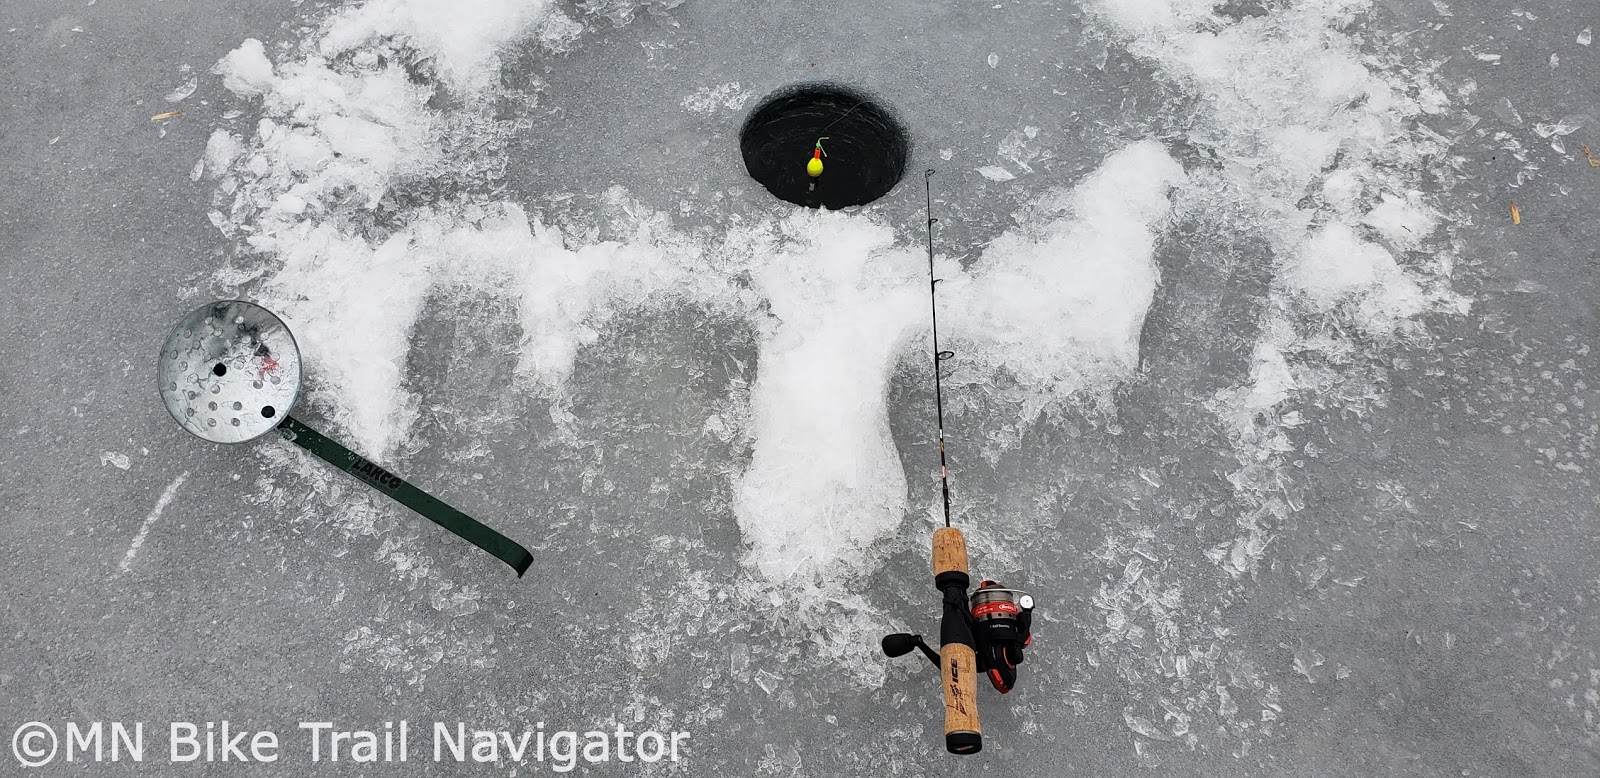
I had an old Strikemaster Mora auger but wanted something a little more compact that I could also use with my cordless drill.  The Nero Mini Compact Ice Auger was the perfect choice.  With the turn of a wing nut it could be opened fully or folded in half measuring only 25 inches long. The shaft can also be extended to 53 and 61 inches for drilling through thicker ice.  The blades are so sharp I could even drill a whole while sitting in my folding chair. Punching a couple of holes to start fishing took barely any time at all.  A little slush removal with an ice scoop and I'm ready to fish.


For carrying minnows I use a small cooler or bucket with a battery operated bubbler to keep them lively and to circulate the water to prevent ice from forming.  For short trips when panfishing I will bring some crappie minnows in a 20 oz. Bait Up container.  Wax worms are stored in a bait puck that I keep in my pocket to keep them from freezing and to provide quick access if I need to re-bait my hook.

A small jig box with tackle and a clip on ice fishing depth finder round out my ice gear.  Next winter I plan on purchasing a flasher fish/depth finder but for this season the clip on worked great for finding the depth and only cost $2.29 for a two-pack.


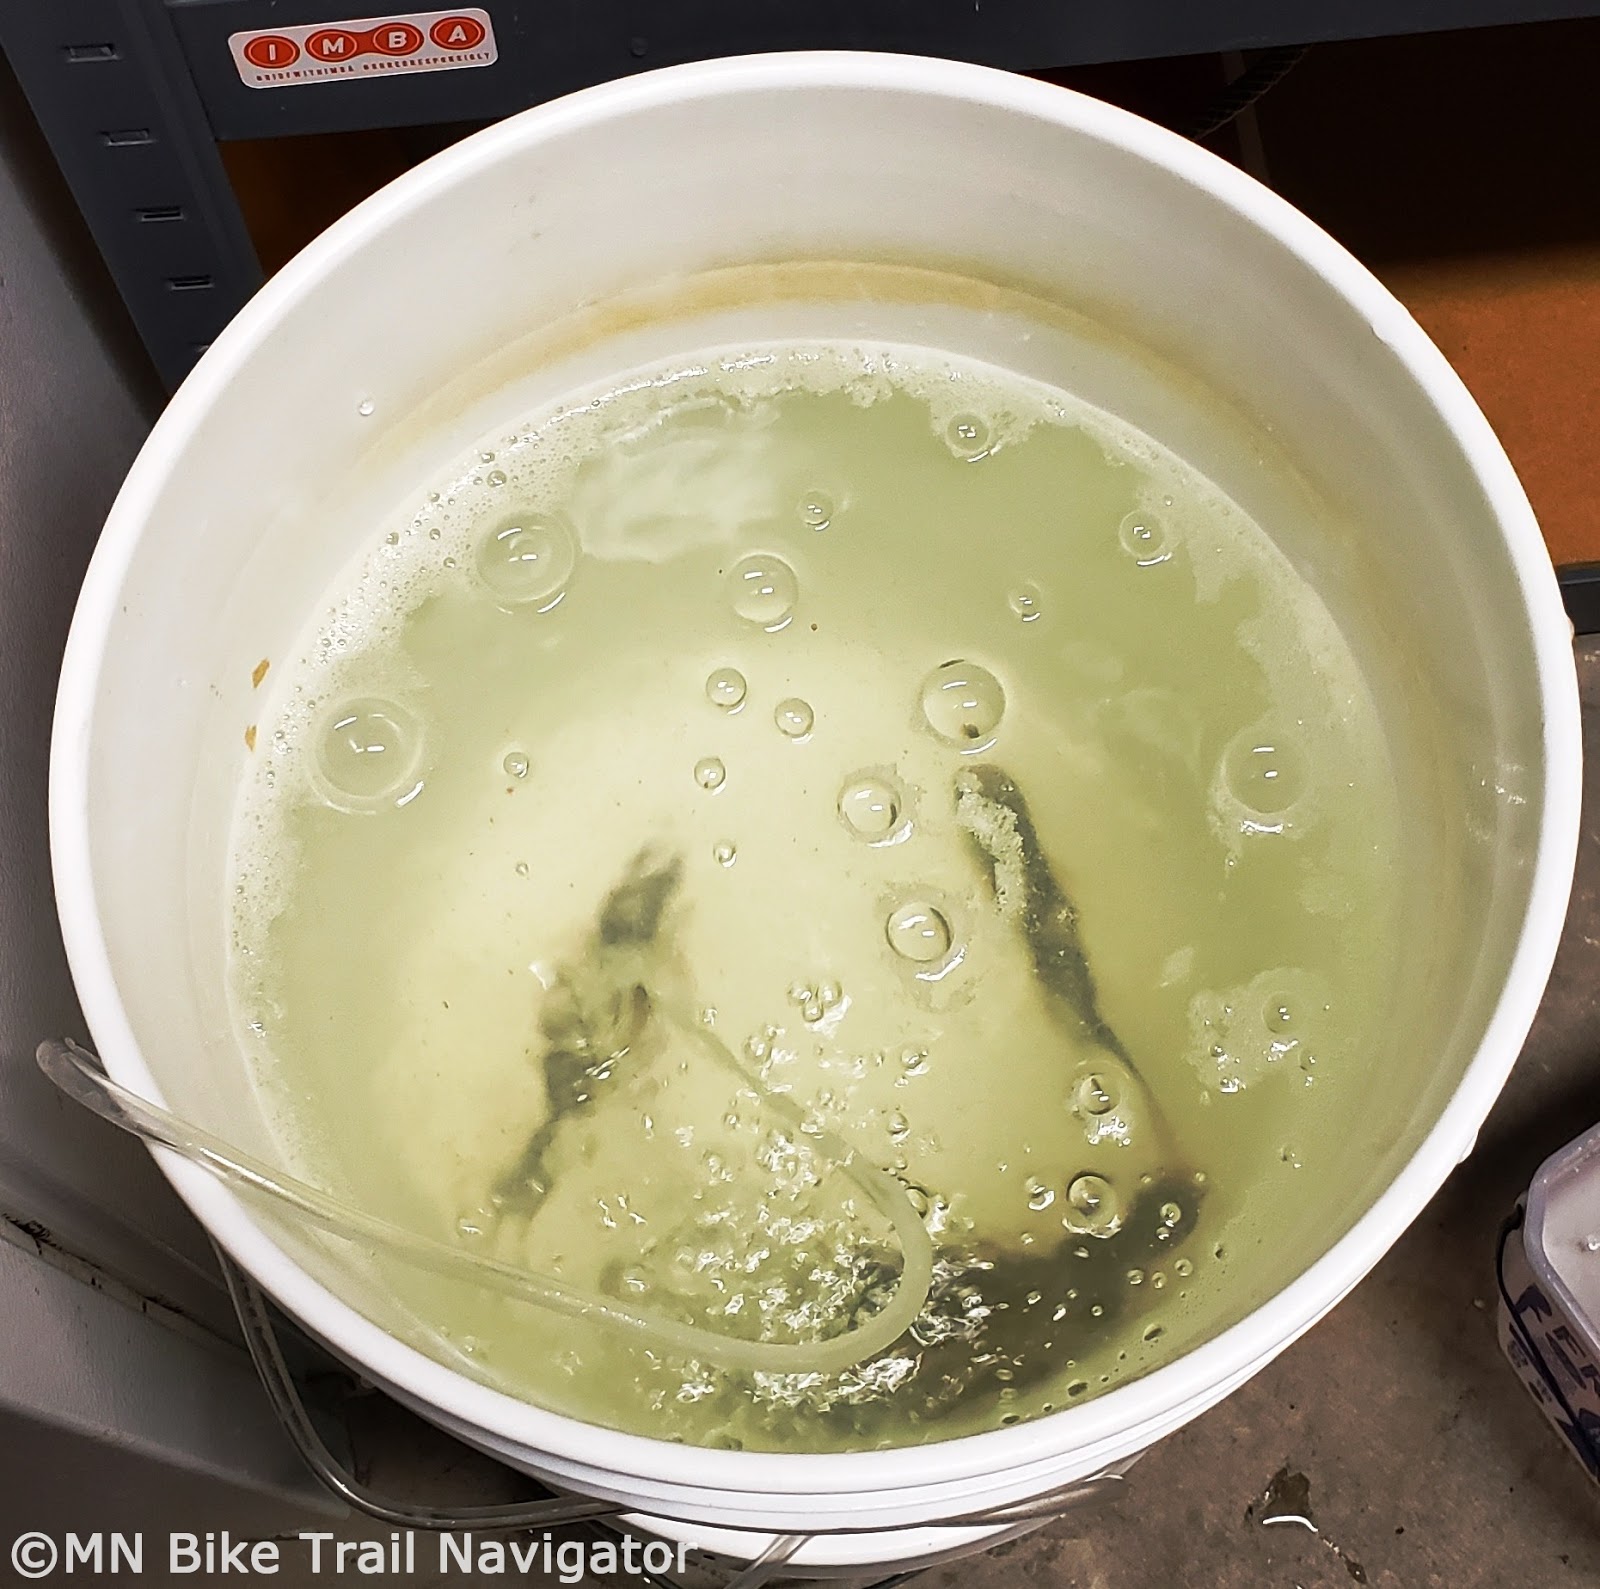
In between ice fishing trips I stored my crappie and sucker minnows in a five gallon bucket equipped with an aquarium pump in the garage.  This meant I always had live minnows when I was ready to go fishing again.  I would only take what I thought I would need for the time spent fishing and leave the rest behind.  Doing this saved a lot of money on bait and trips to the bait store.

Bike Gear


Besides the fatbike, there is some bike gear that is needed for moving around on the lakes.  Some of these I already had while the rest was picked up at my local hardware store.

Until there is packable snow there will be glare ice and studded tires are a must to keep the bike upright and in control.  A commuter backpack comes in handy for the times I want to travel light.

For longer outings when I need to bring more gear I will pull a sled or Smitty sled loaded up and strapped down to secure the load.  To pull these sleds a harness will be needed with quick connect carabiners.  I made my harness with 3/8" synthetic rope pulled through 1/2" pvc pipe.  The length I used was 5' so the sled would not pull too close behind my rear wheel.  The pvc pipe acts as a stiffener for the rope so if I stopped suddenly my sled would also instead of sliding into my back tire.  This pvc/rope combination should be crossed (secured with a zip tie) as seen in the picture for better stability and trailing while turning.  To give the harness the necessary clearance to keep it from rubbing on my tire I secured it to a clamp-on style back rack since my carbon frame has no rack mounts.

Clothing


I stay warm in my winter cycling apparel on the ride out to my fishing spot but that changes quickly once I stop moving.  What works while riding will leave me cold while fishing.  This is why I bring extra clothing and boots, especially on colder days or if there is wind.  In my sled or backpack I'll have a pair of waterproof gloves and a mid-layer or two to give me some extra insulation while tending to my lines.  I also keep a hand towel close by to dry my hands after handling bait and fish.  Having the extra clothing really helps extend the amount of time I can spend out on the ice before getting cold and heading back.

Methods


The type of fish I wanted to catch, length of time I would spend on the ice, amount of gear needed and ice/snow conditions would be the main factors that would determine which method I would use to roll out onto the ice.  I came up with three ways that worked well for what I wanted to accomplish.


Backpack-style
For short trips or when I wanted to travel light and get in a ride, I would go backpack-style. I use a Banjo Brothers Large Commuter Backpack because it's the perfect size to fit all the gear I need, including my auger.  This setup was perfect for getting in a little morning bite before work or a 12 mile bike ride with some fishing at potential hotspots along the way.


Sled-style
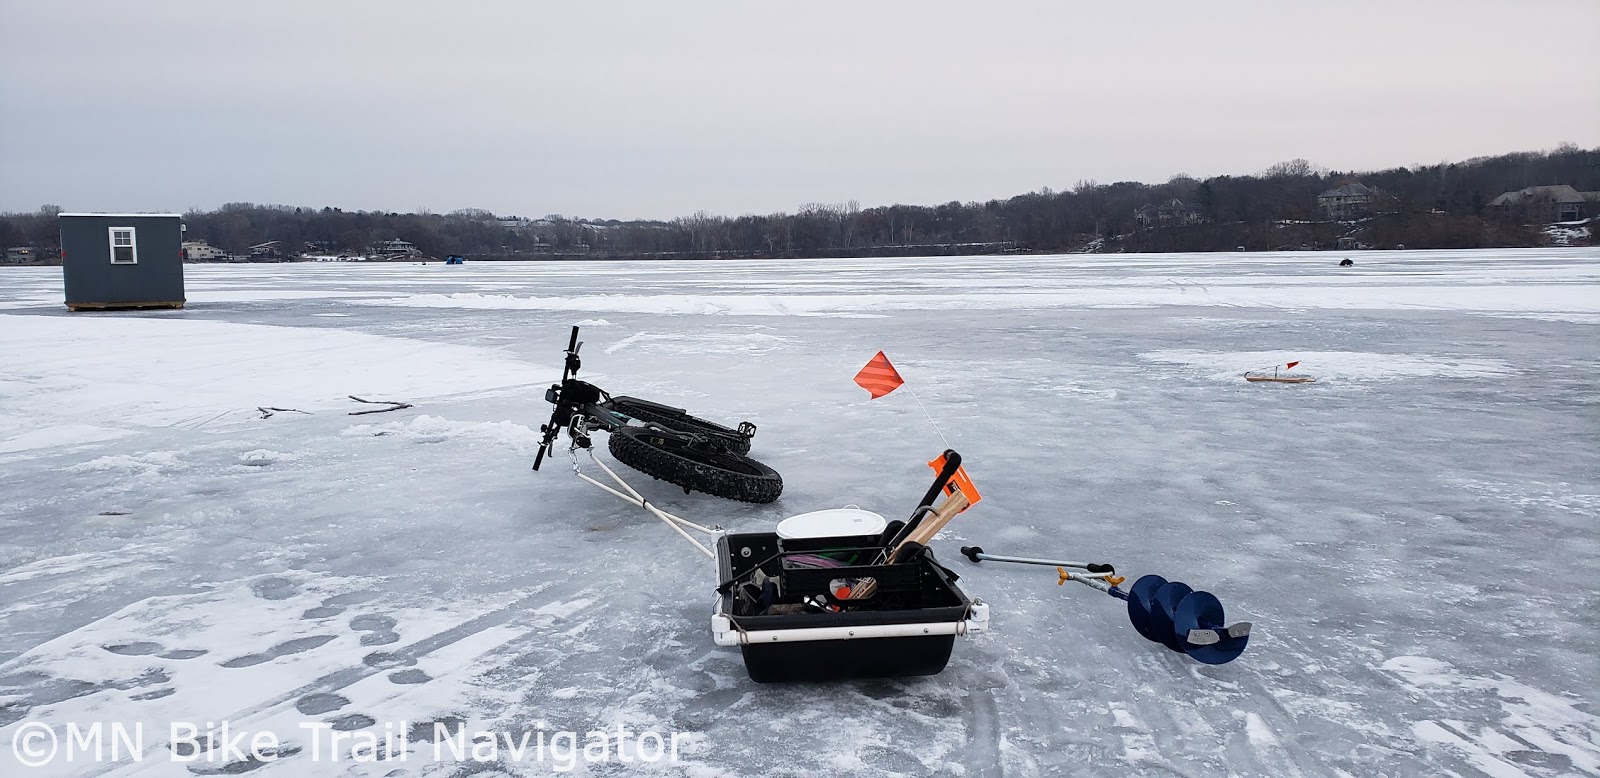
Early in the season there isn't as much snow cover so pulling a sled is my first choice when not traveling light.  I purchased a tub-style sled from a hardware store (a small ice fishing sled such as a Shappell Jet Sled Jr. will also work) and equipped it with the necessary hardware to pull it behind my bike.  The sled was small enough so it was lightweight but large enough to carry my fishing gear, bait bucket and extra clothing.  With this setup I am able to move around the lake easily to find where the fish are biting.


Smitty sled-style
When hauling heavier gear or rolling deeper snow cover I strap my sled to a Smitty Sled I made with some scrap lumber, a pair of old downhill skis I got for $7 at Savers and some hardware to put it all together.  The Smitty Sled makes it much easier to pull my gear out onto the lake than just a sled alone.  It was pretty simple to make and there are a ton of pictures and plans online for making your own.

Tips & Tricks


Getting around on the lakes early in the season is pretty easy due to light or non-existent snow cover but studded tires are a must.  As the season moves on and snow cover is deeper and a little packed one can get by pretty easily without studs.


Anyone who has ridden a fatbike in deep snow knows how tough it can be.  As the ice fishing season rolls on snow cover on lakes can make it a little more challenging.  To keep moving fast and easy I opt to follow the ice roads and snowmobile trails made by other fisherman.  These roads and trails tend to be more hard packed and usually lead to some good fishing spots too.


For some shelter from the wind while fishing, a portable flip-over ice shelter like the Clam Fish Trap can be used.  I wanted something a little more lightweight and portable so I constructed a frame from 3/4" pvc pipe that was bolted onto the sled and could be assembled in minutes.  A medium weight plastic tarp could then be draped over it and secured with spring clamps.  Now I had an effective windbreak that would allow me to fish longer before feeling winter's chill.  Using a bucket or milk crate in the sled to sit on, I was ready to fish.

Fishing Apps

Ice Report
I put my smartphone (Android) to work during the season using a couple of apps that are well known among ice fishermen.  The first is a free app called Ice Report and is available for IOS and Android.  I don't like going out on the lakes until there is at least 4 inches or more of ice and Ice Report was very useful during the early season.  I could get ice thickness reports from other fishermen that were out there in the last day or two.  On the bike I could cover a lot of distance on the lake so I fished multiple areas and uploaded my own reports for other fishermen.


Boating HD by Navionics
The second app is Boating HD Marine & Lakes by Navionics and is available for both IOS and Android. It is a free app download that comes with basic features and a two-week trial of the subscription to check out all the maps including Nautical Chart, Sonar Chart, Chart Updates and Community Edits from millions of Boating HD app users.  I played around with the app during this trial period and liked it so much that I purchased a 1-year subscription of their "USA" map for $14.99.

The app was extremely useful for finding the depth contours of lakes to get to the spots I knew would contain fish.  It would tell me the approximate depth of the water before even drilling a hole in the ice.  I could plot my tracks and add waypoints but the feature I used most was adding markers for fishing hotspots and potential areas that I could come back to later and check out.  The app was definitely a big help out on the ice and I plan on continuing to use it for some shoreline bikefishing during the rest of the year.

Ice Safety


Ice safety is a priority when I roll out onto any lake.  This is why I carry a pair of ice picks worn on my shoulders in the event I go through the ice.  With these I will be able to pull myself out of the water much easier than without.  I always let someone know where I am going and when I expect to be done, just in case.  A keen eye on the ice as I ride out helps me avoid pressure ridges and water flows where ice thickness may be questionable.

In Conclusion

I had a lot of fun ice fishing by fatbike this winter.  I was able to move quickly around on the lakes to find where the fish were biting while carrying all my gear.  I did get a lot of strange looks from ice fishermen and spoke with a few others that thought it was a really great idea that they would consider doing themselves.  If you already have a fatbike it's just a matter of getting a little bit of ice fishing gear and you're ready to go.

This article was written after the ice fishing season so getting out there now isn't an option but I recommend entertaining the idea next winter.  I learned a lot during my first season trying this and wanted to share it with others and who knows, maybe we'll see a lot more fatbikes out on the ice in the future.

3/07/2019

Facebook Groups To Motivate You To Bike More In 2019


One of my goals for 2019 is to bike more than I have done in previous years.  I've stocked up on the necessary gear and apparel for the upcoming warm weather riding season as well as those chilly shoulder season before and after winter (got the winter thing covered).

Social media has been an inspiration for me to explore different cycling disciplines, ride places I've never been and learn new things.  Over the past few years I've put together several Facebook groups to help cyclists of all levels connect with others that share their interests.  In this article I will introduce them to you so that you may also #bikemorein2019.


MN Fatbike Enthusiasts is a group for anyone that finds joy in riding fatbikes anytime and anywhere. It doesn't matter if you're a beginner or you've been rolling fat a long time, this group will teach you something and let you share what you know with others.  MN Fatbike Enthusiasts is a public* group with over 750 members.

Group created: October 1, 2015

Description
This public group is a resource for anyone that enjoys riding fat no matter what the season. You don't have to be from Minnesota to be in the group, but keep the discussion related to fatbike riding in Minnesota in regards to events, trails, trail conditions and news. This group is a place to share your ride photos, fatbike leans, bring fatbike events (in MN) to the group's attention, discuss equipment, bikes or fatbike Q&A. Please do not post group rides here, that is what the MN Fatbike Group Rides Facebook Group (https://www.facebook.com/groups/MNFatbikeGroupRides) is for. Also, please refrain from posting "For Sale" items, there are plenty of groups on Facebook for that.


Gravel is big in Minnesota and we have thousands of miles of it to explore.  MN Gravel Enthusiasts helps bring together cyclists that share a love of taking the road less traveled.  With over 1,700 members ranging from newbies to seasoned veterans, this public* group is the place to talk Minnesota gravel.

Group created: January 9, 2015

Description
This public group is a resource for anyone looking to ride gravel, share gravel routes, post group rides or events (races, rides, etc.), discuss equipment or gravel Q&A. This is a Minnesota specific group, so please keep posts Minnesota gravel related. If sharing gravel road routes, please use the following formats:
GPX files, TCX files, Strava, Mapmyride, RideWithGPS, Runtastic, Garmin Connect, Endomondo or Gravelmap.com links. 


Got a fatbike and you're looking for others to ride with? MN Fatbike Group Rides is the group you want to join.  It's a place where you can find fatbike rides all over the state or post up your own rides and meet some new friends out on the trail.  MN Fatbike Group Rides is a public* group with over 1,500 members.

Group created: October 31, 2014

Description
After some content deviation from the original intent of this group, the admins and I have drawn up the MN Fatbike Group Rides code/conduct policy. The policy is as follows:

- Posts should be about a group ride you are planning or soliciting interest for.
- Be clear about the time, mileage drop/no-drop and pace of the ride. 
- Attending a group ride that is not mentioned in this group? Post it.
- Please include links to more information about the group ride if available (MORC Forum, etc.)
- Please put post-ride photos/video in the comment section of that listed ride, not as a new post.
- Please refer fatbike related questions/comments to Facebook groups dedicated to that kind of discussion.

Thank you for your cooperation.

Original Group Description:

I created this group to make it easy for my fatbike friends and their friends to get together by posting their own group rides. Minnesota has a lot of fatbikers with riding schedules that may not include the weekends. This is a place where they can organize their own rides with friends and new acquaintances any day of the week. My work schedule keeps me from joining in on Saturday group rides but I'm available on Sundays and Mondays. Others of you may have other availability, that's why I created this group. Are you looking for some Tuesday afternoon ride partners at Murphy or Thursday night ride companions at Elm Creek? This group is designed to get fatbikers together for rides that fit their schedules. I miss out on so many fatbike group rides because of my work schedule that I wanted to create a Facebook group that was open to the public and would allow other members, not just those with weekends off to connect and ride together. Invite your friends and let's ride fatbikes together.


MN Group Bike Rides was created to bring Minnesota cyclists of all disciplines together for group rides whether you're a roadie, mountain biker, gravel crusher or trail rider.  Join in on rides, post up your own or share that weekly shop ride you enjoy.  MN Group Bike Rides is a public* group with over 1,000 members.

Group created: March 11, 2015

Description
This group is intended to bring cyclists in Minnesota together for group rides by providing a place to post them.

- Posts should be about a group ride you are planning or soliciting interest for. These can be Road, Off-Road, Gravel or MTB.
- Be clear about the time, mileage drop/no-drop and pace of the ride.
- Attending a group ride that is not mentioned in this group? Post it.
- Please include links to more information about the group ride if available (MORC Forum, etc.)
- Please put post-ride photos/video in the comment section of that listed ride, not as a new post.
- Please refer bike related questions/comments to Facebook groups dedicated to that kind of discussion.


MN Mountain Bike Enthusiasts is for all those that love mountain biking in Minnesota.  Use this group as a place to discuss all things mountain biking whether it be Q&A, recommendations or just showing off pictures of your bike out on the trail.  MN Mountain Bike Enthusiasts is a public* group with over 400 members.

Group created: February 26, 2016

Description
This group is a resource for anyone that enjoys mountain biking no matter what the season.  You don't have to be from Minnesota to be in the group, but keep the discussion related to mountain biking in Minnesota in regards to events, trails, trail conditions and news.  This group is a place to share your ride photos, MTB leans, bring MTB events (in MN) to the group's attention, discuss equipment, bikes or MTB Q&A.  Please do not post group rides here, that is what the MN Group Bike Rides Facebook Group (https://www.facebook.com/groups/MNGroupBikeRides/) and MN Fatbike Group Rides Facebook Group (https://www.facebook.com/groups/MNFatbikeGroupRides/) are for.  Also, please refrain from posting "For Sale" items, there are plenty of groups on Facebook for that. 


Are you thinking about riding down at the MN River Bottoms in Bloomington and Eagan but aren't sure about the condition of the trails or which areas may be under water?  Check the MN River Bottoms Ride Report Facebook group for the latest ride stories, photos and recommendations from those that have been riding down there.  After your own visit to the river bottoms post up and tell others about your experience.  MN River Bottoms Ride Report is a public* group with over 1,300 members.

Group created: November 15, 2016

Description
This group was designed to allow members to post their ride stories for the Minnesota River Bottoms trail network in a real time, easy to use format. Post up your experiences on the MN River Bottoms Trail in the Minnesota Valley National Wildlife Refuge, Fort Snelling State Park and the Bloomington side of the river, as well as areas further west. Posts can include the area you rode, your story with pictures, tips and recommendations for other users of the trails. 


Sport-Utility Fatbikers is a group I created this winter for fatbikers that use their bikes as sport-utility vehicles for a variety of different activities.  I wanted to explore some other adventures with my fatbike other than just riding singletrack in 2019.  Some of these include bikecamping/packing, fishing and hunting.  A fatbike is the perfect human-powered vehicle for these tasks and this is the group to share those ideas and inspire others.  Sport-Utility Fatbikers is a closed** group with over 70 members.

Group created: December 12, 2018

Description
This group is a resource for anyone that uses their fatbike for hunting, fishing, bikepacking, bikecamping, fatbike bikejoring, winter commuting or adventure riding.

Members should use this group as a forum to exchange ideas, ask questions, get answers and encourage other fatbikers to try something new and different. Share your utility fatbike ride photos, leans, discuss equipment, rigs and bike setups.


Please do not post group rides here, that is what the MN Fatbike Group Rides Facebook Group (https://www.facebook.com/groups/MNFatbikeGroupRides) is for. Also, please refrain from posting "For Sale" items, there are plenty of groups on Facebook for that.


Last summer I began riding my bike to work a lot more and found bike commuting was way more fun than going by car.  I couldn't wait for work to be over so I could jump on my bike and take the long way home.  The idea to start the Twin Cities Bike Commuters Facebook group came out of these commutes. This group would provide a forum for discussions about safety, gear and Q&A for beginners as well as veteran bike commuters in the Twin Cities metro area.  Twin Cities Bike Commuters is a public* group with over 160 members.

Group created: July 29, 2018

Description
This public group is a resource for Twin Cities bike commuters to share routes, tips, ask and answer questions, provide updates on trail/road conditions and to be a forum for those looking to go by bike to work instead of driving a car. 


One of my favorite styles of mountain biking is to venture off the trail and find my line on various types of terrain, otherwise known as bushwhacking.  When the question was posed by a couple of my friends on the MN River Bottoms Ride Report group asking why there were no fatbike bushwhacking Facebook groups, I sprang into action and created MN Fatbike Bushwhackers.  I thought only myself and a small number of others enjoyed this style of riding but it turns out to be quite popular among more adventurous fatbikers looking to do some exploring.  MN Fatbike Bushwhackers is closed** group with over 85 members.

Group created: January 13, 2019

Description
MN Fatbike Bushwhackers is for any fatbiker that ventures off the beaten path to explore nature where there are no trails.  Whether you like to ride woods, beaches, ice or areas where you probably won't see other people, this group is for you. 

Discussions about setups, gear, techniques and places of interest to ride can be shared in this group.  Post up your leans, ride photos and descriptions about the cool places no one else is riding.


Group rides can be posted in this group as long as they are bushwhacking in nature. All others should be posted in their appropriate groups. 


Are you interested in riding some new gravel or have a great route you want to share with other gravel enthusiasts in Minnesota?  The MN Gravel Route Share Facebook group is looking for members like you.  MN Gravel Route Share is a public* group with nearly 400 members.

Group created: July 29, 2018

Description
This public group is a resource for anyone looking to share or find gravel cycling routes ONLY. This is a Minnesota specific group, so please post routes that include Minnesota gravel roads. Neighboring states are ok as long as part of the route is in Minnesota.

When sharing gravel routes, please use the following formats:


GPX files, TCX files, Strava, Garmin Connect, Mapmyride, RideWithGPS, Runtastic, Endomondo or Gravelmap.com route links. 


Twin Cities Mountain Bike Ride Report is a Facebook group similar to the MN River Bottoms Ride Report.  Members can post up information about their rides with pictures and recommendations for singletrack trails in the Twin Cities area.  Twin Cities Mountain Bike Ride Report is a public* group with over 70 members.

Group created: July 29, 2018

Description
This group was designed to allow members to post their ride stories for singletrack trails in the Twin Cities area in a real time, easy to use format. Post up your experiences from any of the trails in the metro. Posts can include the place you rode, your story with pictures, tips and recommendations for other users of the trails.

If you want to post up your ride report for the MN River Bottoms, there is a specific group for that, the MN River Bottoms Ride Report. https://www.facebook.com/groups/MNRiverBottomsRideReport/ 


Social media has really brought together the bike community as a whole and Facebook groups help riders of all abilities join in on the discussion, learn some new things and make new friends.  Explore these groups to see which ones are right for you and join one or several today.

*Anyone can see the group’s name, location, member list, and posts, and the group can show up in anyone’s searches or News Feed.

**A Closed group’s name, description, and member list are not at all “closed,” but are publicly visible. Closed groups may even show up in a search publicly. Overall, they are just as open as Public groups, except for three main differences: (1) new members must ask to join or be invited by a member, rather than just adding themselves; (2) only current members can see the content of group posts; and (3) only current members can see the group in their News Feed. - Source: Electronic Frontier Foundation

2/19/2019

Dressing for Winter Riding: What Works For Me


When it comes to riding bikes in the Minnesota winter, dressing appropriately for the weather is very important to keeping warm, dry and comfortable.  For the last six years I have spent a lot of time riding in conditions where my non-cyclists friends and family think I'm crazy.  During that time I have learned a lot of what works for me and what doesn't.  In this post I will go over some of my findings and the gear I use to help you dial in the right apparel choices to beat winter's chill and stay comfortable without overheating.

Head

Keeping my head warm without overheating isn't a challenge with the right gear for the conditions. Most of the time I'll wear my snowboard helmet in combo with a balaclava, beanie or neck gaiter.  My snowboard helmet (Smith Vantage MIPS) has two vent closures to help regulate heat and on really cold rides I can close the vents until I need to open them if I begin to get too warm.  When it's a little warmer out I'll wear my mountain bike helmet (Bontrager Rally MIPS) with the appropriate head/face covering.

Beanies (Bontrager B2 Beanie & Pearl Izumi P.R.O.Thermal Run Hat) work great when I need a little more warmth combined with some wicking action if my head gets a little hot.  Neck gaiters (Bontrager Convertible Cycling Neck Gaiter) are very versatile for a variety of conditions because they can be worn to cover the neck, face and head to trap heat and wick away moisture.  Wind stopping balaclavas (Bontrager Windshell Balaclava,  GORE WINDSTOPPER Balaclava & The Weatherneck) are my go-to for windy or really cold temperatures.  They completely cut the wind and protect my face from frostnip and wind burn.  For sub-zero rides I like to wear my ColdAvenger Pro SoftShell Mask.  It's fleece keeps my face and neck warm and dry while the patented ventilator warms and humidifies the cold dry air making it much easier to breathe in the extreme cold.

Goggles (Smith Knowledge OTG) are a lifesaver for a variety of conditions to see better, keep eyes from watering and give a little extra face protection from the elements.  Spend a little more on a pair of goggles with plenty of ventilation to keep them from fogging up.  A cheap pair of goggles does no good if they are frosted over fifteen minutes into a ride.  There are a lot of anti-fog products (I use Fogtech DX) on the market that work pretty good at keeping the frost at bay but good ventilation is the key.

Core
 

Keeping my core warm without overheating used to be a challenge when I had only a couple baselayers and one jacket.  Over the years I've collected all kinds of baselayers (wool, polyester and wool blends) and purchased a few more jackets (including a Bontrager OMW Softshell Mountain Bike JacketBontrager Velocis S1 Softshell Cycling Jacket) to cover a wide spectrum of winter cycling conditions and temperatures.  Through my experiences I have learned the right combinations for layering of light/heavier baselayers (including Columbia Men’s Midweight Stretch Baselayer Long Sleeve Shirt, WSI Full HEATR Shirt, & Bontrager Evoke Mountain Bike Hoodie) and choosing the proper jacket to achieve a comfortable ride in just about anything Minnesota winters can throw at me.

By experimenting with different layering combinations and taking mental notes of the outcome for the conditions, you too can find that sweet spot without being too hot or cold.  Keep in mind that you will start out a little chilly but quickly warm up as you get going.  Baselayers not only trap heat but their other function is to wick away moisture for heat management.  Having a quality jacket that is breathable and windproof is key to letting sweat vapor pass through and to keep chilling winds from cooling your core.

An important note for making your selections is to keep in mind the type of ride you'll be doing.  Will it be a slow-roll on flat groomed singletrack, a moderate-paced trudge through 2" of fresh powder or a fast-paced ride with plenty of elevation change?  Use the right layering for the job at hand.  When I'm scouting or bushwhacking I'm rolling slow and not working up much of a sweat so I will layer more to accommodate the temperature.  Faster paced or more strenuous rides will require a lot less insulation as the body will be generating plenty of its own heat.

Legs

Legs may not require as much layering to stay warm as the core does, usually a thin baselayer and a windshell/breathable pair of pants or tights should do the trick.  This combination is simple and doesn't require too much trial and error to get it right for the conditions.  On days above freezing I will usually ditch the baselayer, but when its below freezing I will opt for a light baselayer (old Craft model no longer made) or the WSI Full HEATR Pant when it's really cold outside.  To keep my butt warm in the saddle I will always wear a pair of Bontrager Troslo inForm Cycling Liner Bib Shorts (not shown).  You'd be amazed at how a chamois can provide that little bit of extra insulation to prevent cold cheeks.

My Bontrager Old Man Winter Softshell Pants are perfect for all-winter fatbike riding because of their water-resistant and wind-resistant qualities.  Whether splashing through puddles or riding in a snowstorm these pants will keep you warm and dry.  When riding my gravel bike I usually go for my Bontrager Velocis S2 Softshell Cycling Tights for a more fitted feel with breathable thermal fabric.

For later in the winter when the snow gets a little deeper and I may find myself having to hike-a-bike I will wear a pair of 45NRTH Beargraven Gaiters to keep out the snow out of my boots and to provide a little extra warmth on my shins.

Feet

My feet get cold easily and they are the first things to start feeling winter's nip on a ride.  Because of this I have spent a lot of time, effort and money trying to figure out the proper sock/boot combinations to keep me riding in any temperature.  Before the boots go on the sock(s) choice is made depending on the temperature and length of time I wish to ride.  I'm a big fan of Merino wool socks and have a bunch of them in various thicknesses and lengths.  Merino wool traps heat, wicks away moisture and continues to keep its insulating properties even when wet.  Some of the brands I have used year after year because of their quality are Swiftwick, DeFeet, Wigwam and Carhart.

I'll use a lighter thickness wool sock for warmer winter rides and a combination of a WSI HEATR Sock as a liner under a heavier wool sock for longer rides or when it really gets cold out.  Through a lot of experimentation I now know the right sock(s) for the temperature and duration of my rides.


Sometimes my socks need a little extra help to keep my toes warm so I opt for chemical toe/foot warmers.  When needed, most of the time I will use adhesive toe warmers.  I can stick them to the sock on the top or bottom of my toes or for extra warmth, both.  My feet will still eventually get cold but these do buy me a lot of extra time out in the elements.  I will stock up on them at the end of the season when the stores have them on clearance giving me a cheap supply for next winter.


As I mentioned previously, my feet get cold easily so boot choice for the temperatures and conditions is important to me.  The factors I consider before a ride are temperature, duration, weather conditions (wet/dry/icy/snow) and sock options that will work best with the selected boot.

Early and late Winter will have a lot of warmer days where my choice is an old pair of Lake neoprene cyclocross boots with a merino wool sock.  This combo keeps my feet warm and dry, especially with the wet conditions that time of the year can present.

Throughout the rest of the winter considering the factors I mentioned above I will alternate between two boots, 45NRTH Wölvhammers (2nd gen.) and Lake MXZ 400's.  After several winters with with these boots in just about every kind of weather I've really tuned in the whole sock/boot combination thing.  Layering socks works too, just make sure there is still room in the toe box so as to not cut circulation which will bring on cold toes even faster.

Hands

Hands are usually the first to get cold and the right glove choice can keep you rolling instead of cutting the ride short.  I have four pairs of gloves (Bontrager
RXL Waterproof Softshell Split Finger GlovesBontrager Velocis S2 Softshell Split Finger GloveBontrager Velocis S1 Softshell Glove & an old pair of Louis Garneau Roubaix)  and one pair of WSI Sports HEATR Glove Liners to choose from depending on the length of the ride and the outside temperature.  For colder or extended rides I will opt for lobster mitts with or without the glove liners.  These mitts are windproof and waterproof keeping my fingers warm and dexterous in snowstorms and windy arctic weather days.

For those warmer winter days and nights I have a couple pair of full finger gloves which do the trick at keeping my hands warm without overheating. These are usually my go-to gloves for early/late winter and for those warm fronts that occasionally move in.


If your hands get cold in spite of well insulated gloves, try inserting a chemical hand warmer pack into each glove to give hands a little extra warmth.  These packs usually last five to ten hours depending on the brand and really help on longer, colder rides.

Image Credit: Markman Outdoor Photography

If you're new to winter cycling or just would like to do it more frequently, invest in some good winter apparel.  Conditions and temperatures continue to change all winter long and you will need more than a "one-outfit-fits-all" approach to what you will wear.  What may work fine for 25°F on a windless sunny day could leave you cold on a 20°F windy day.  Start building your collection of apparel for varying conditions and over time with some trial and error you will learn to dial in the right choices for the weather.
Related Posts Plugin for WordPress, Blogger...