Showing posts with label Ice Fishing. Show all posts

2/13/2020

Fatbike Ice Fishing and How to Do It-Revisited


Last season I spent some time on my fatbike in pursuit of panfish and northern pike on several frozen area lakes.  Riding the ice was an efficient way to move me and my gear to many of my favorite fishing spots.  Through trial and error I was able to find out what worked and what didn't.  I came to the conclusion that I needed to upgrade some of my gear and add a a few new things to make the '19-'20 ice fishing season more successful and comfortable in the cold weather.  I would have to add items that would be light and portable for hauling behind the bike so I spent the off-season doing my research and purchasing the necessary gear.

In this post I will discuss my new gear, the methods used and how ice conditions and weather affect which of these methods I use.  In addition, I will also touch on some tips and things I learned during the current season.  If you are interested in fatbike ice fishing, this post will guide you in the right direction to get you started.

Ice Fishing Gear

The first step to improve upon last season was to add a new level of comfort while out on the ice.  One of the first items I purchased was an Eskimo Quickfish 2 hub shelter.  I chose this portable shelter for its light weight (22 lbs), size (5'x5' footprint) and 60 second setup/tear down.  This would get me out of the wind so I can fish longer without getting cold.  Next I needed a portable heater to warm the hub shelter so I went with one popular with ice fisherman, the Mr. Heater Portable Buddy Heater.  This little heater really kicks out the warmth.  Most of the time I run it on low and a 1 lb propane cartridge will last about 5 hours and 3 hours on high.


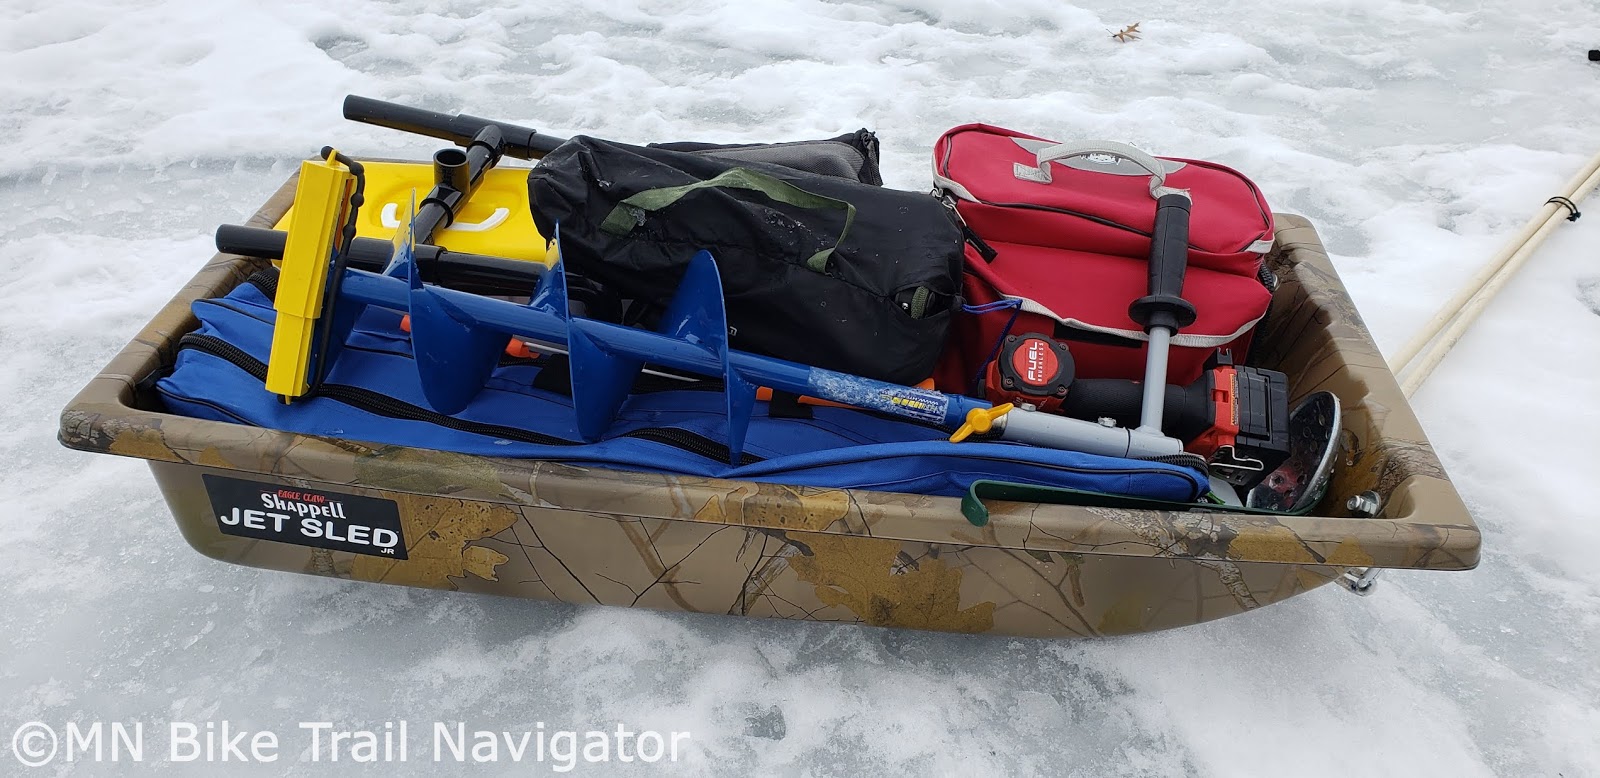
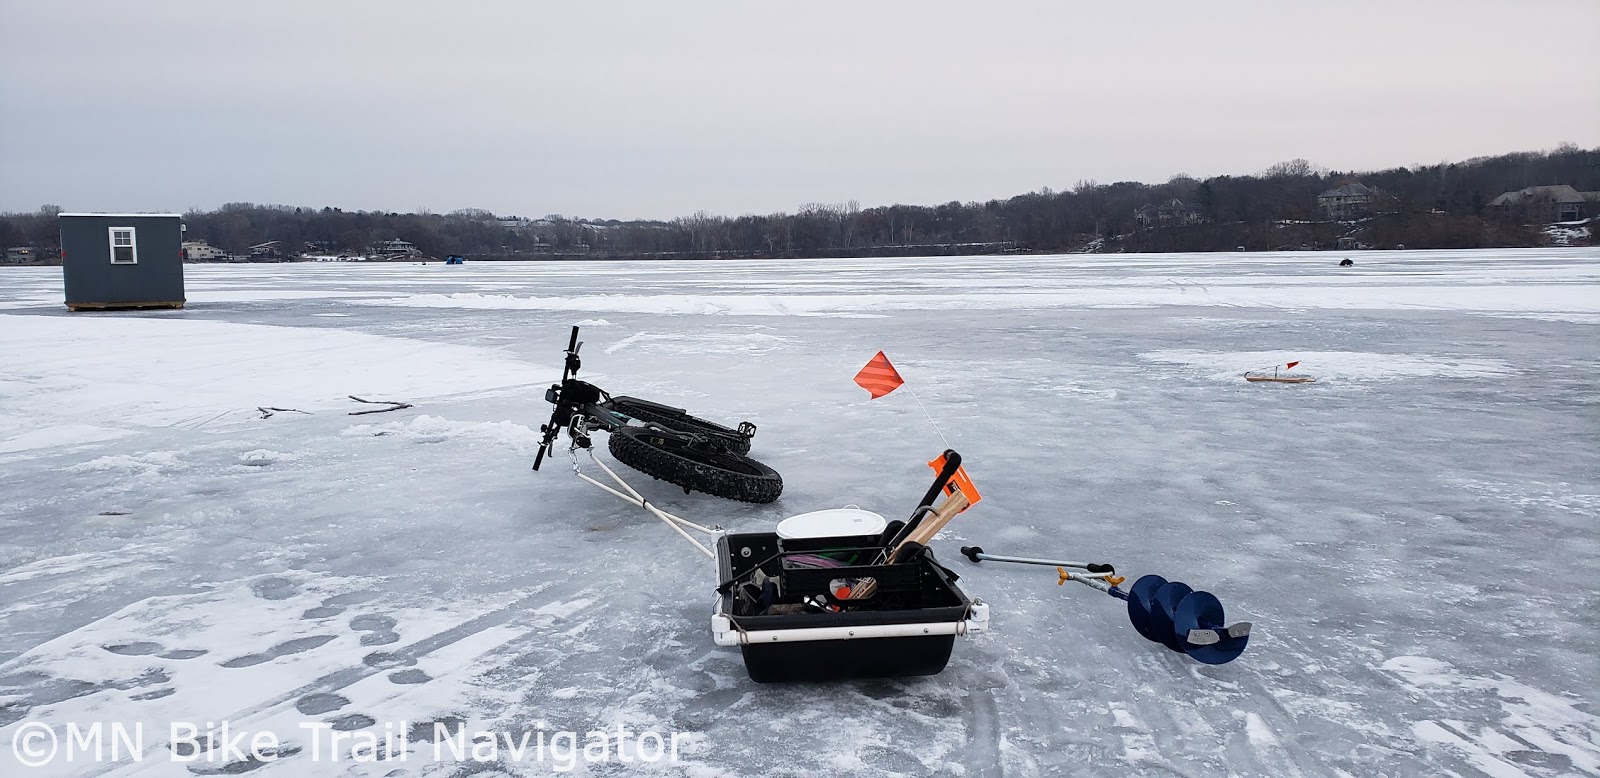
I would need a durable sled that was big enough to haul all my gear around on the lakes but light enough to be practical for pulling with my fatbike.  I already had my Smitty sled from last season so the Shappel Jet Sled Jr., weighing in at 6 lbs with a size of 42"L x 21"W x 8"H, would be a perfect fit for this application.  I went with the Shappel Ice Fishing Sled Travel Cover to keep items from falling out while traveling the rough terrain of the ice.  All the new gear I would be hauling is heavier than what I used last season so I opted for the Clam Sled Pulling Harness that I could clip onto my Smitty sled with tow ropes (3/8" rope inside 1/2" pvc tubing, crossed and zip tied with carabiners on each end).  This setup would prove to be very good for getting to my fishing spots with not too much extra effort.


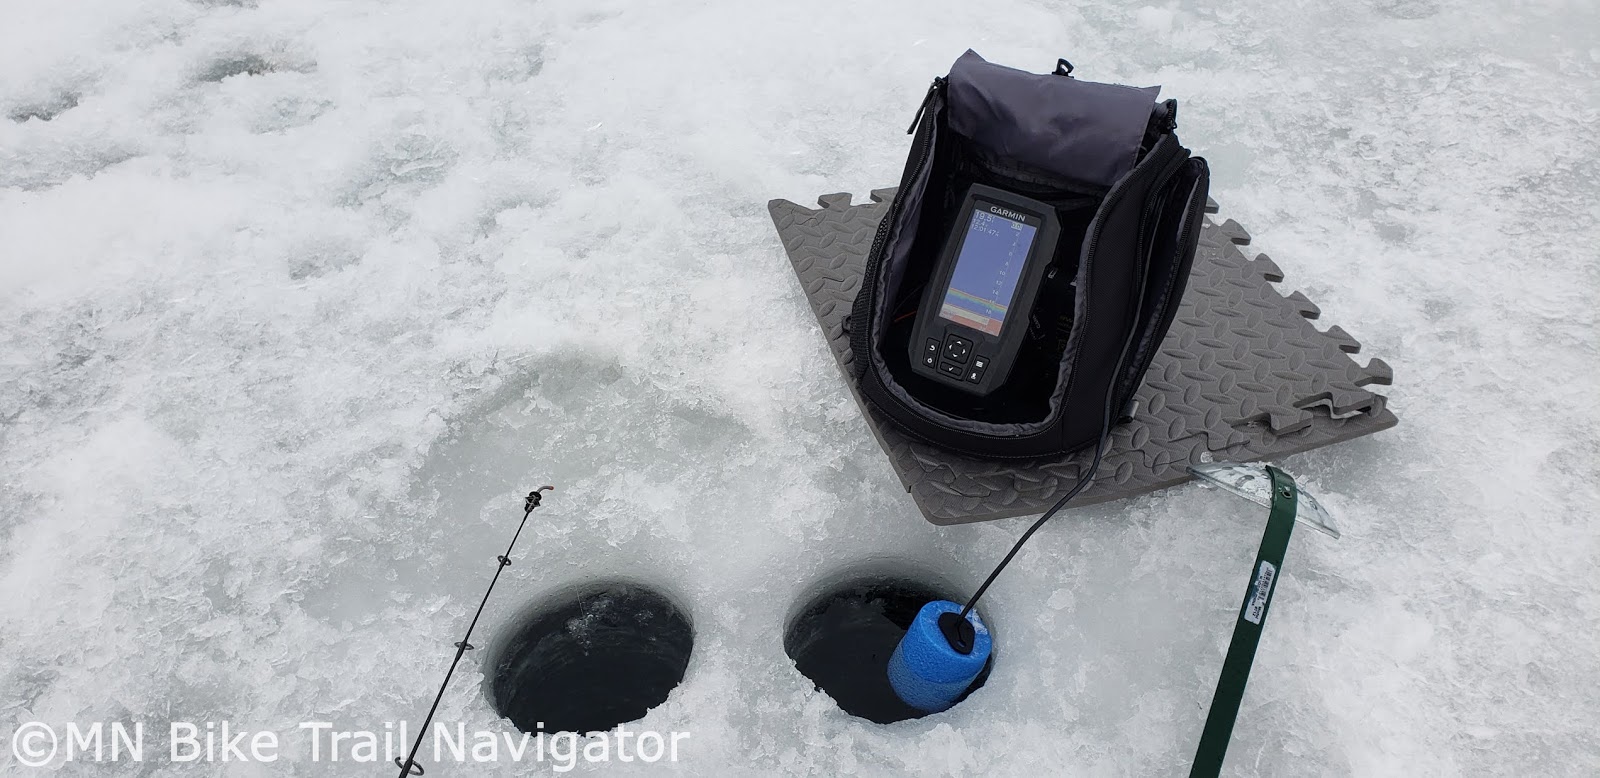
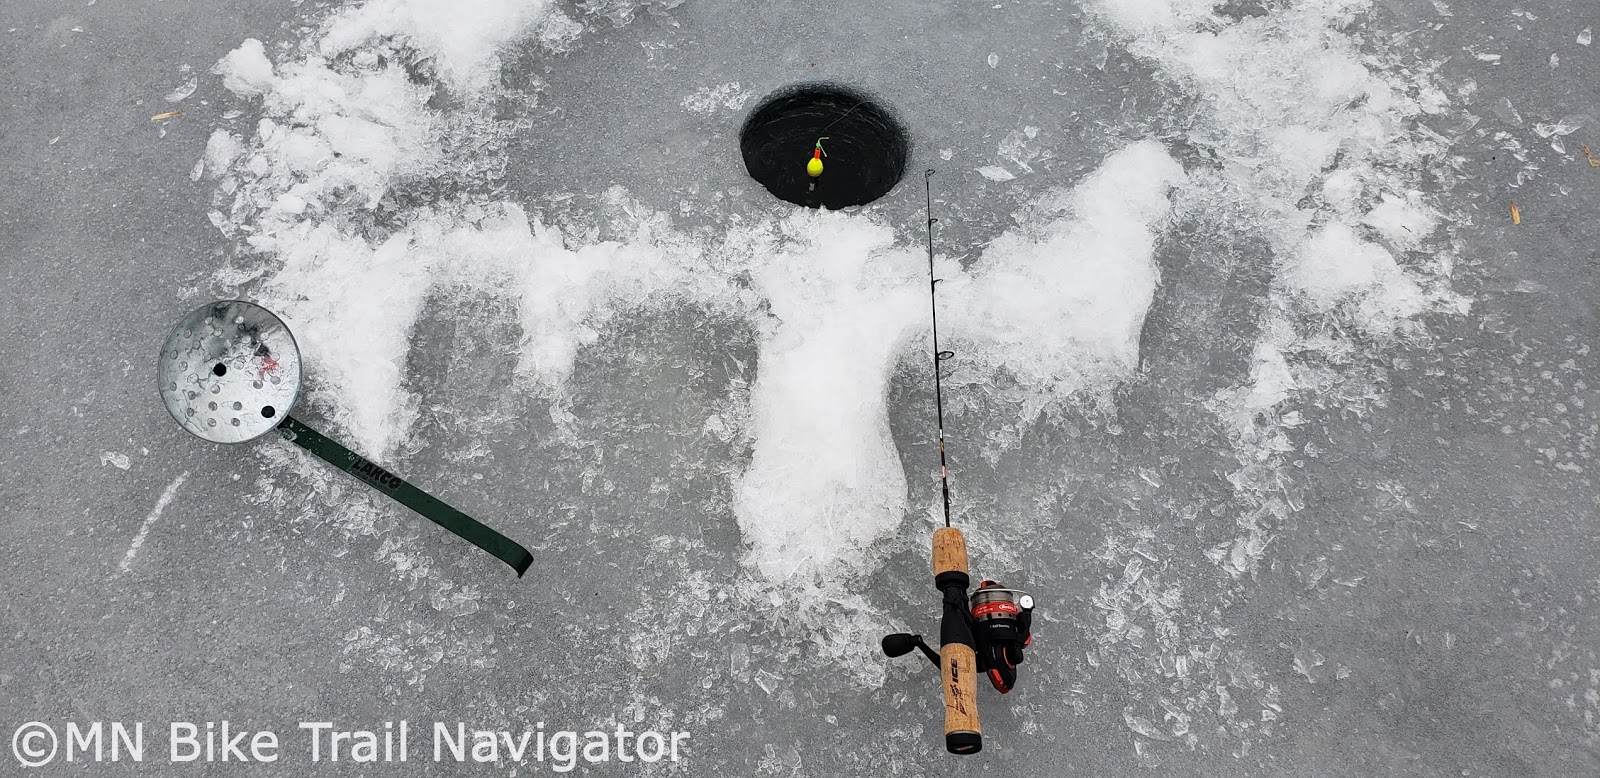
Knowing structure, depth and fish presence where I'm fishing improves the odds of a successful outing greatly.  This season I added a Garmin STRIKER™ Plus 4 with Small Portable Ice Fishing Kit to my arsenal to give me the information needed to target the fish I would be after.  I chose this model for both its flasher and graph modes as well as GPS marking of hotspots and its price point.  Usually I will drill a hole when I get to a spot that I want to fish and will graph it.  Sometimes I'll even drop a line in the water and jig to graph fish activity before committing to the spot.  This helps me avoid wasting time in an area that may not be productive.  Interlocking foam mats (like the one seen above) work good for getting my fish finder or heater up off the ice and out of the water.


I still have my Nero Mini Compact Ice Auger with Drill Adapter from last year and had never used it with a cordless drill.  I wanted to speed up the hole drilling process so I purchased a Milwaukee M18 FUEL™ 1/2" Hammer Drill w/ ONE-KEY™ Kit.  I chose this drill because of the 1,200 in-lbs of torque,  Anti-Kickback technology and long battery life.  This compact drill has tons of power and paired with the Nero auger it rips right through the ice like butter.  On one hole hopping day recently I drilled 13 holes through 17" of ice and barely used 1/4 of the battery.

My Milwaukee drill also pulls other duties out on the ice.  With an Eskimo Ice Anchor Drill Adapter in the chuck it saves me time installing and removing ice anchors to secure my hub shelter to the ice.  On a day when the fish are biting I can quickly make an ice livewell for my catch with the auger/drill combo.  A compact foldable shovel comes in handy for clearing snow and ice from around drilled holes and doesn't take up too much room in my sled.


For night fishing I use a rechargeable LED camping lantern to light up the inside of my hub shelter.  This compact light has 280/140 lumens that lasts from 5 to 11 hours and also a 3000mAh power bank in the event I need to charge up my phone.  It also comes in handy when it's time to tear down and load up the sled in the dark.

Bike Gear

Any  fatbike in good working order that has been properly maintained can be used out on the ice.  Winter riding is what these bikes were made for.  Lake conditions are constantly changing throughout the season and a good pair of studded fatbike tires are a must to keep the bike upright and in control while providing the extra traction needed when pulling a sled.  I always carry a compact tool kit on my bike just in case any mechanical problems should arise.  The last thing I want to do is push a bike while hauling a sled full of gear 2 miles back to the lake access.  If you plan on doing any night fishing, a bright front light and rear taillight will help see your way out onto the lake while getting you seen by other fishermen that are coming and going.

Clothing

What clothing I wear is determined by the weather, method and duration of time to be spent out on the ice.  A breathable, windproof outer shell with the appropriate baselayers for the temperature is a must for staying warm.  Since most of the time I won't be riding for that long I don't worry about overheating with extra layers, I'll need them to stay warm once I stop to set up and begin fishing.  The amount of layers I wear ice fishing would be overkill resulting in sweating a lot if I was just riding singletrack, but ice fishing is another story.  Once I stop to fish my body will no longer be generating heat and I will become cold quickly so the extra layers are necessary.  For rides that take longer to get to my spot I will sometimes bring extra layers in my sled that I can put on for warmth once I stop to fish.  Doing this keeps me from sweating on the way out and back which prevents me from getting cold once I stop.

Methods

My fatbike allows me cover a lot of ice with my gear quickly so I can spend more time fishing and less time getting there.  Below are several ways I implement fatbike ice fishing based on weather, length of time I have to fish and gear needed.


When the temps are warm and the wind is light I'll opt for what I call "backpack-only style."  This is a minimalist approach to fatbike ice fishing.  It doesn't require much gear and is a good choice for an active panfish-bite outing.  My bag of choice for carrying my gear is the Banjo Brothers Large Commuter Backpack.  It has 32.8 liters of space that's big enough to hold my compact auger, rods/tip-ups, bait, ice scoop and camp chair.  This bag supports the weight well and makes hole hopping easy.


Another method I'll use when the weather is favorable is hole hopping.  This is the best method I know for finding actively feeding panfish.  My fatbike paired with a sled or Smitty sled/sled combo allows me to move easily around on the ice fishing many areas for a short time until I find the active bite.  This works great for finding the fish on a lake I don't know that well.


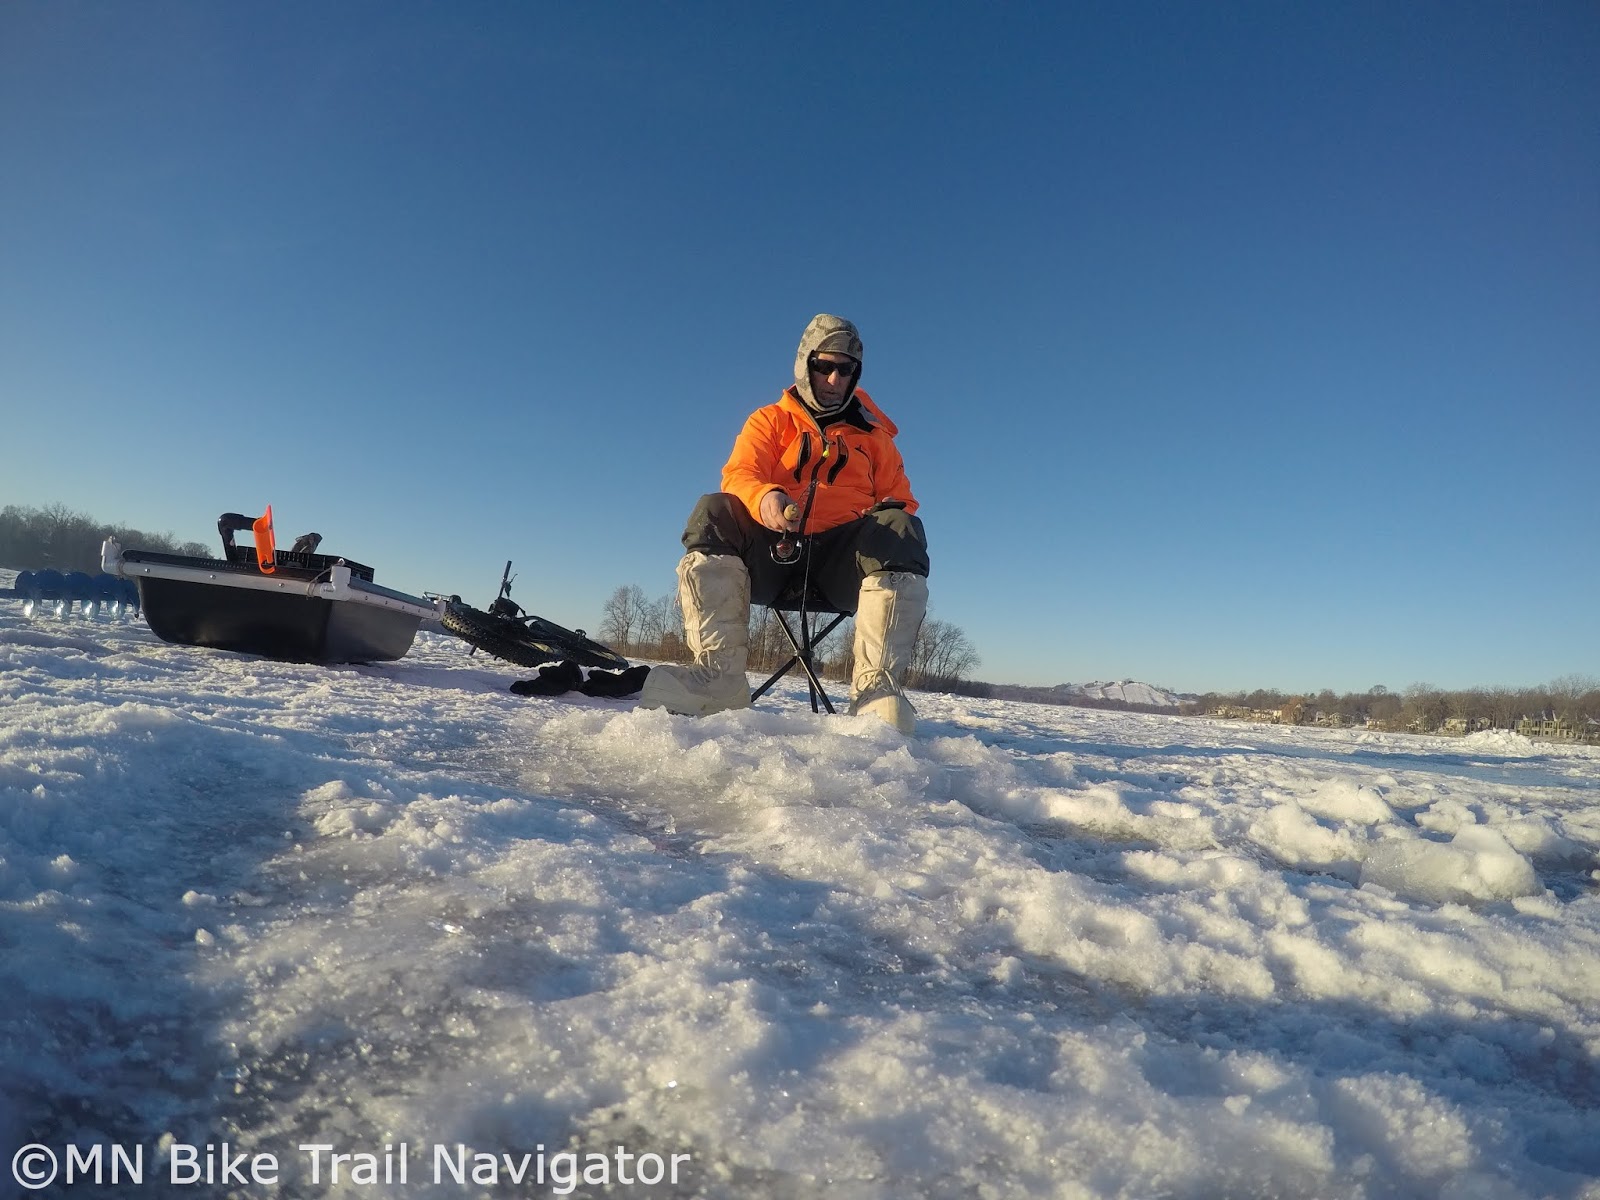
Getting out of the wind and cold makes ice fishing much more comfortable for those longer outings.  This season with my Eskimo Quickfish 2 and Mr. Heater Portable Buddy Heater has been great for keeping me warm for hours in very cold temperatures.  It's big enough for up to two people to fish but compact and light enough to carry in my sled.  This is my go-to method for my days off from work where I have plenty of time to fish.


I'll usually use the Shappel Jet Sled Jr. by itself if there is light snow cover or the lake is very icy.  During these ice conditions even fully loaded up the sled pulls rather easily.


Heavier sled loads and/or deeper snow conditions require use of my Smitty sled to make hauling gear easier.  By putting my loaded Jet Sled Jr. onto the Smitty sled the two skis cut right through deep snow and glide along the ice with a lot less resistance.  This is my method of choice whenever I am hauling all my gear or the snow is 3" deep or more.  It definitely makes it easier going out on the lake.

Ice Conditions 

Early in the season there may be minimal or no snow cover on the lakes making travel by fatbike very quick and easy.  Safety out on the ice during the early season should be taken very seriously.  I don't venture out until the ice is at least 4" thick and it is a lake that I know well.  These conditions are perfect for hole hopping and using a sled.


Warm spells or the weight of a heavy snowfall can produce slush or water on top of the ice making travel difficult by fatbike so I try to avoid these conditions.  Once freezing temperatures solidify things again the surface of the lake can be rutted and rough to ride but with studded tires providing extra traction it can be done.  Warm weather for a period followed by a refreeze can make deep snow covered ice rideable again by firming everything up for pulling a sled or Smitty sled combo.


Snow covered lakes can still be accessible by fatbike but may limit where I can ride.  I will usually stick to ice roads or atv and snowmobile tracks where the snow has been packed down to get near where I want to set up.  I may have to do a little hike-a-bike once I get off the beaten path though.  The Smitty sled/sled combo or backpack-only style is perfect for moving around on the lake in deeper snow.

Fishing Apps

Ice Report
I put my smartphone (Android) to work during the season using a couple of apps that are well known among ice fishermen.  The first is a free app called Ice Report and is available for IOS and Android.  I don't like going out on the lakes until there is at least 4 inches or more of ice and Ice Report was very useful during the early season.  I could get ice thickness reports from other fishermen that were out there in the last day or two.  On the bike I could cover a lot of distance on the lake so I fished multiple areas and uploaded my own reports for other fishermen.


Boating HD by Navionics
The second app is Boating HD Marine & Lakes by Navionics and is available for both IOS and Android. It is a free app download that comes with basic features and a two-week trial of the subscription to check out all the maps including Nautical Chart, Sonar Chart, Chart Updates and Community Edits from millions of Boating HD app users.  I played around with the app during this trial period and liked it so much that I purchased a 1-year subscription of their "USA" map for $14.99.

The app was extremely useful for finding the depth contours of lakes to get to the spots I knew would contain fish.  It would tell me the approximate depth of the water before even drilling a hole in the ice.  I could plot my tracks and add waypoints but the feature I used most was adding markers for fishing hotspots and potential areas that I could come back to later and check out.  The app was definitely a big help out on the ice and I plan on continuing to use it for some shoreline bikefishing during the rest of the year.

Ice Safety

Ice safety is a priority when I roll out onto any lake.  This is why I carry a pair of ice picks worn on my shoulders in the event I go through the ice.  With these I will be able to pull myself out of the water much easier than without.  I always let someone know where I am going and when I expect to be done, just in case.  A keen eye on the ice as I ride out helps me avoid pressure ridges and water flows where ice thickness may be questionable.

In Conclusion

The upgrades in equipment that I made before the season sure paid off.  I can now get to where I need to go with as much or little gear as I want to bring for the method I will be doing.  Fishing longer and more comfortably while having fun and success was the goal and I achieved it with the gear mentioned above.  The biggest game changers were the addition of a fish finder, hub shelter and cordless drill.  If you're already an ice fisherman you probably have most of the gear needed and adding a fatbike to the mix can bring a new level of ice fishing enjoyment.

1/29/2020

A Winter Getaway Weekend at True North Basecamp


January meant it was once again time for my yearly trip to True North Basecamp for a weekend outdoors on the lakes and trails of the Cuyuna Country State Recreation Area.  Reports were that the trail conditions were stellar and this time around I would be trying my luck at ice fishing on a mine pit lake.

The Accommodations

Our accommodations were at the Artcrank Cabin located on the shore of Armour #2 Mine Lake at True North Basecamp in Crosby, MN.  This would be our "basecamp" for a weekend full of outdoor activity.


The Trails
Day 1-Portsmouth & Yawkey

Once we got unpacked with all of our gear settled into the cabin and had a little lunch it was time to hit Cuyuna's groomed singletrack.  One of the perks of staying at True North Basecamp is being able to jump right onto the trails from the cabin.


It was 1° F when we were ready to roll and the high would be around 7° F so Alex and I layered up in our subzero gear since we would be out until sundown.  This meant choosing apparel that would provide the proper balance to keep warm without overheating.  Sweat can be your enemy and cut a ride short when the temperatures are this cold.


We headed down the trail connector from the Basecamp and then jumped on Drag Line (South), the Cuyuna Lakes State Trail and back onto Drag Line (North) for a ride that would take us all the way around Portsmouth Mine Lake.


A little ways past the Portsmouth Campground is the public water access where we could get out onto the lake.


The snow wasn't too deep so we ventured out for a roll in the virgin powder that was covering the ice.


After riding the Portsmouth Unit we took the New Haul Road back into the trails of the Yawkey Unit.  Here we would ride Man Cage, Manuel Drive, Trout, Tugger and Bobsled until the sun began to set where we headed back towards the basecamp on Haul Road.


Day one trail conditions were perfect.  The groomed singletrack was hard-packed and very fast.  We had to make sure to keep our eyes on the trail because if we veered off just slightly the snow was very deep and a crash was inevitable.

Day 1-Portsmouth & Yawkey

Day 2-Portsmouth/Mahnomen Unit

Day 2 would take us through the Portsmouth Unit on our way to the Mahnomen Unit where there would be a bit of climbing and some fast downhill sections.  We followed the connector trail, Switchback from the west end of Portsmouth Mine Lake until we got on Galloping Goose which would take us along the south shore of Huntington Mine Lake.  We left Galloping Goose for the Sidewinder connection to Sand Hog Mountain.


After a scenic climb we made it to the overlook on Sand Hog Mountain and stopped for a photo op.  Now it was time for the fast ride down the mountain and back onto Galloping Goose.


We got off the trail on Miner's Mountain Road and rode past Miner's Mountain Rally Center on our way to the Cuyuna Lakes State Trail.  The freshly groomed state trail was our fast track back to our cabin at True North Basecamp.

Day 2-Portsmouth/Mahnomen Unit

Day 2-Ice fishing

After our morning ride we relaxed a bit and had lunch.  Our cabin was right on Armour #2 Mine Lake so I wanted to try my luck at ice fishing while Alex would get some outdoor photos and video.  The trout season opener was the following weekend so I was unable to fish many of the lakes in the CCSRA because they are designated trout lakes that cannot be fished out of season.  After a stop at Oars-N-Mine in Crosby for some bait and "intel" on the lake, I would get started.  The lake our cabin was on was open for fishing so I drilled a few holes to check depths and structure near the inlet of Serpent Creek being careful to stay far enough away from the open water.  I was pretty close to shore and the water was 28' deep with 6" of ice.

Once I found a spot near the creek inlet that had fish both suspended and near the bottom I decided to set up and fish until dark.  It was nice being so close to our cabin in case I needed anything.  I graphed a lot of fish and presented a variety of different baits, both live and artificial, but they just weren't biting that afternoon.  I decided to try a Swedish Pimple spoon tipped with a minnow head to see if I could get the attention of some larger panfish.  That didn't work either except for this hungry little northern pike.  He was a "hammer handle" so I let him go so he could grow.  There must be some big northerns in this lake because he had half of his tail bitten off.


After catching the little pike the bite was dead.  Around sunset the fish must have moved out to deeper water because I was no longer graphing them on my fishfinder.  I packed things up after dark and hauled my gear the short walk back to the cabin.  We planned on doing a night ride on the trails but after being outside all day long we were wiped out and hungry so we skipped it to relax and eat dinner in the cabin.  We still had one more morning to ride.

Day 3-Back to the Mahnomen Unit

Checkout was at noon but we wanted to get in another ride so we headed out early and took the fastest way back to the main trailhead at the Mahnomen Unit via the Cuyuna Lakes State Trail.  Here we would get a chance to ride some of our favorite trails one more time.  The scenery throughout the Mahnomen Unit is spectacular with the stands of pines, birch trees and overlooks of the mine pit lakes and land surrounding them.


We took our time to enjoy the ride and scenery on a light dusting of snow from the previous night before jumping back onto the Cuyuna Lakes State trail for the ride back to the basecamp.

Day 3-Back to the Mahnomen Unit

Short Video Recap of the Weekend

It was a great weekend at Cuyuna.  There's so much to do here and only so many hours in the day.  We packed in as much as we had the energy to do spending much of our time outside despite the cold temperatures that weekend.  True North Basecamp is the perfect place to stay and play while visiting Cuyuna.  Because of its prime location, everything we wanted to do was accessible by foot, bike or 5 minute car ride.  The cabin served as our basecamp for sleeping, taking breaks, getting something to eat or just warming up so we could get back outside and ride our bikes.  If you enjoy fatbiking, snowshoeing, cross-country skiing or ice fishing, make True North Basecamp your "basecamp" on your next winter adventure.

3/24/2019

Fatbike Ice Fishing and How to Do It


For the last couple of winters I've spent some time out on the lakes riding my fatbike and doing so gave me the idea to combine two things I enjoy, cycling and ice fishing.  This winter I finally gathered together the gear and did it.  Through trial and error, some advice from my pro fisherman friend and input from the ice fishing community on social media, I was able to put together some efficient and effective methods for going after fish during hardwater season.  In this article I will go over some of the gear needed, methods used and a few tips and tricks for a successful and fun outing.

Ice Fishing Gear


I was in need of some new ice fishing gear and a fishing license so I did a little shopping at the start of the season.  I picked up a couple of 24" light action rods for jigging panfish and old school wood tip ups for northern pike.  To protect the rods during transport in a backpack or bucket I covered them with with some inexpensive rod sleeves.


I had an old Strikemaster Mora auger but wanted something a little more compact that I could also use with my cordless drill.  The Nero Mini Compact Ice Auger was the perfect choice.  With the turn of a wing nut it could be opened fully or folded in half measuring only 25 inches long. The shaft can also be extended to 53 and 61 inches for drilling through thicker ice.  The blades are so sharp I could even drill a whole while sitting in my folding chair. Punching a couple of holes to start fishing took barely any time at all.  A little slush removal with an ice scoop and I'm ready to fish.


For carrying minnows I use a small cooler or bucket with a battery operated bubbler to keep them lively and to circulate the water to prevent ice from forming.  For short trips when panfishing I will bring some crappie minnows in a 20 oz. Bait Up container.  Wax worms are stored in a bait puck that I keep in my pocket to keep them from freezing and to provide quick access if I need to re-bait my hook.

A small jig box with tackle and a clip on ice fishing depth finder round out my ice gear.  Next winter I plan on purchasing a flasher fish/depth finder but for this season the clip on worked great for finding the depth and only cost $2.29 for a two-pack.


In between ice fishing trips I stored my crappie and sucker minnows in a five gallon bucket equipped with an aquarium pump in the garage.  This meant I always had live minnows when I was ready to go fishing again.  I would only take what I thought I would need for the time spent fishing and leave the rest behind.  Doing this saved a lot of money on bait and trips to the bait store.

Bike Gear


Besides the fatbike, there is some bike gear that is needed for moving around on the lakes.  Some of these I already had while the rest was picked up at my local hardware store.

Until there is packable snow there will be glare ice and studded tires are a must to keep the bike upright and in control.  A commuter backpack comes in handy for the times I want to travel light.

For longer outings when I need to bring more gear I will pull a sled or Smitty sled loaded up and strapped down to secure the load.  To pull these sleds a harness will be needed with quick connect carabiners.  I made my harness with 3/8" synthetic rope pulled through 1/2" pvc pipe.  The length I used was 5' so the sled would not pull too close behind my rear wheel.  The pvc pipe acts as a stiffener for the rope so if I stopped suddenly my sled would also instead of sliding into my back tire.  This pvc/rope combination should be crossed (secured with a zip tie) as seen in the picture for better stability and trailing while turning.  To give the harness the necessary clearance to keep it from rubbing on my tire I secured it to a clamp-on style back rack since my carbon frame has no rack mounts.

Clothing


I stay warm in my winter cycling apparel on the ride out to my fishing spot but that changes quickly once I stop moving.  What works while riding will leave me cold while fishing.  This is why I bring extra clothing and boots, especially on colder days or if there is wind.  In my sled or backpack I'll have a pair of waterproof gloves and a mid-layer or two to give me some extra insulation while tending to my lines.  I also keep a hand towel close by to dry my hands after handling bait and fish.  Having the extra clothing really helps extend the amount of time I can spend out on the ice before getting cold and heading back.

Methods


The type of fish I wanted to catch, length of time I would spend on the ice, amount of gear needed and ice/snow conditions would be the main factors that would determine which method I would use to roll out onto the ice.  I came up with three ways that worked well for what I wanted to accomplish.


Backpack-style
For short trips or when I wanted to travel light and get in a ride, I would go backpack-style. I use a Banjo Brothers Large Commuter Backpack because it's the perfect size to fit all the gear I need, including my auger.  This setup was perfect for getting in a little morning bite before work or a 12 mile bike ride with some fishing at potential hotspots along the way.


Sled-style
Early in the season there isn't as much snow cover so pulling a sled is my first choice when not traveling light.  I purchased a tub-style sled from a hardware store (a small ice fishing sled such as a Shappell Jet Sled Jr. will also work) and equipped it with the necessary hardware to pull it behind my bike.  The sled was small enough so it was lightweight but large enough to carry my fishing gear, bait bucket and extra clothing.  With this setup I am able to move around the lake easily to find where the fish are biting.


Smitty sled-style
When hauling heavier gear or rolling deeper snow cover I strap my sled to a Smitty Sled I made with some scrap lumber, a pair of old downhill skis I got for $7 at Savers and some hardware to put it all together.  The Smitty Sled makes it much easier to pull my gear out onto the lake than just a sled alone.  It was pretty simple to make and there are a ton of pictures and plans online for making your own.

Tips & Tricks


Getting around on the lakes early in the season is pretty easy due to light or non-existent snow cover but studded tires are a must.  As the season moves on and snow cover is deeper and a little packed one can get by pretty easily without studs.


Anyone who has ridden a fatbike in deep snow knows how tough it can be.  As the ice fishing season rolls on snow cover on lakes can make it a little more challenging.  To keep moving fast and easy I opt to follow the ice roads and snowmobile trails made by other fisherman.  These roads and trails tend to be more hard packed and usually lead to some good fishing spots too.


For some shelter from the wind while fishing, a portable flip-over ice shelter like the Clam Fish Trap can be used.  I wanted something a little more lightweight and portable so I constructed a frame from 3/4" pvc pipe that was bolted onto the sled and could be assembled in minutes.  A medium weight plastic tarp could then be draped over it and secured with spring clamps.  Now I had an effective windbreak that would allow me to fish longer before feeling winter's chill.  Using a bucket or milk crate in the sled to sit on, I was ready to fish.

Fishing Apps

Ice Report
I put my smartphone (Android) to work during the season using a couple of apps that are well known among ice fishermen.  The first is a free app called Ice Report and is available for IOS and Android.  I don't like going out on the lakes until there is at least 4 inches or more of ice and Ice Report was very useful during the early season.  I could get ice thickness reports from other fishermen that were out there in the last day or two.  On the bike I could cover a lot of distance on the lake so I fished multiple areas and uploaded my own reports for other fishermen.


Boating HD by Navionics
The second app is Boating HD Marine & Lakes by Navionics and is available for both IOS and Android. It is a free app download that comes with basic features and a two-week trial of the subscription to check out all the maps including Nautical Chart, Sonar Chart, Chart Updates and Community Edits from millions of Boating HD app users.  I played around with the app during this trial period and liked it so much that I purchased a 1-year subscription of their "USA" map for $14.99.

The app was extremely useful for finding the depth contours of lakes to get to the spots I knew would contain fish.  It would tell me the approximate depth of the water before even drilling a hole in the ice.  I could plot my tracks and add waypoints but the feature I used most was adding markers for fishing hotspots and potential areas that I could come back to later and check out.  The app was definitely a big help out on the ice and I plan on continuing to use it for some shoreline bikefishing during the rest of the year.

Ice Safety


Ice safety is a priority when I roll out onto any lake.  This is why I carry a pair of ice picks worn on my shoulders in the event I go through the ice.  With these I will be able to pull myself out of the water much easier than without.  I always let someone know where I am going and when I expect to be done, just in case.  A keen eye on the ice as I ride out helps me avoid pressure ridges and water flows where ice thickness may be questionable.

In Conclusion

I had a lot of fun ice fishing by fatbike this winter.  I was able to move quickly around on the lakes to find where the fish were biting while carrying all my gear.  I did get a lot of strange looks from ice fishermen and spoke with a few others that thought it was a really great idea that they would consider doing themselves.  If you already have a fatbike it's just a matter of getting a little bit of ice fishing gear and you're ready to go.

This article was written after the ice fishing season so getting out there now isn't an option but I recommend entertaining the idea next winter.  I learned a lot during my first season trying this and wanted to share it with others and who knows, maybe we'll see a lot more fatbikes out on the ice in the future.

Related Posts Plugin for WordPress, Blogger...